0044. 使用 ctx.filter 实现滤镜效果
- 1. 📝 简介
- 2. 🔗 links
- 3. 📒 notes
- 4. 💻 demo1 - blur
- 5. 💻 demo2 - brightness
- 6. 💻 demo3 - hue-rotate
- 7. 💻 demo4 - drop-shadow
- 8. 💻 demo5 - invert
- 9. 💻 demo6 - sepia
- 10. 💻 demo7 - grayscale
- 11. 💻 demo8 - saturate
- 12. 💻 demo9 - contrast
- 13. 💻 demo10 - 使用 url 引用 svg 滤镜
1. 📝 简介
文档对 ctx.filter 实现滤镜效果做了个简述,快速过了一遍和滤镜相关的部分内容。 陌生的单词有些多…… 需要理解这些单词的含义。
2. 🔗 links
- https://developer.mozilla.org/en-US/docs/Web/API/CanvasRenderingContext2D/filter - MDN - ctx.filter。
3. 📒 notes
ctx.filter 用于设置滤镜效果,跟 css 中的滤镜语法、功能都非常类似。
单词
- brightness,亮度
- hue,色调
- drop,投影,下投
- invert,反转
- sepia,棕褐色,乌贼墨色
- saturate,饱和度
- contrast,对比度
准备辅助函数 createCanvas
javascript
function createCanvas(filterStr) {
  const canvas = document.createElement('canvas')
  drawGrid(canvas, 250, 500, 50)
  document.body.append(canvas)
  const ctx = canvas.getContext('2d')

  ctx.beginPath()

  if (filterStr) {
    ctx.filter = filterStr
  }

  const img = new Image()
  img.src = './安妮娅.png'
  img.onload = function () {
    ctx.drawImage(img, 50, 50)
  }
}4. 💻 demo1 - blur
html
<!DOCTYPE html>
<html lang="en">
  <head>
    <meta charset="UTF-8" />
    <meta http-equiv="X-UA-Compatible" content="IE=edge" />
    <meta name="viewport" content="width=device-width, initial-scale=1.0" />
    <title>Document</title>
    <style>
      canvas {
        margin: 2rem;
      }
    </style>
  </head>
  <body>
    <script src="./drawGrid.js"></script>
    <script src="./createCanvas.js"></script>
    <script>
      // 原图
      createCanvas()

      // ctx.filter = 'blur(5px)'
      // 设置模糊,值越大,模糊效果越明显。
      createCanvas('blur(5px)')
      createCanvas('blur(10px)')
    </script>
  </body>
</html>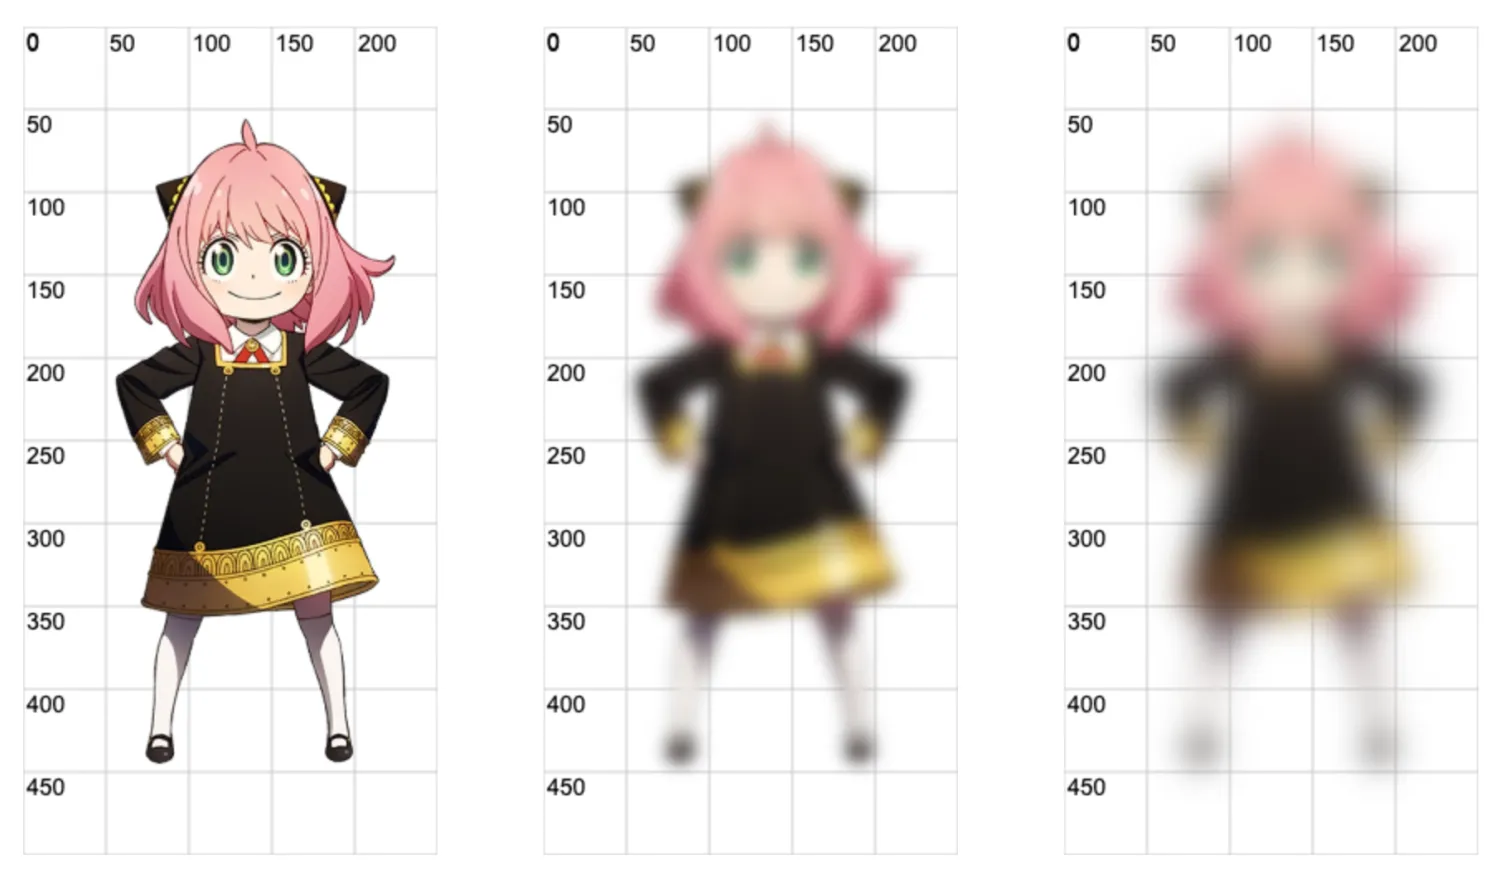
5. 💻 demo2 - brightness
html
<!DOCTYPE html>
<html lang="en">
  <head>
    <meta charset="UTF-8" />
    <meta http-equiv="X-UA-Compatible" content="IE=edge" />
    <meta name="viewport" content="width=device-width, initial-scale=1.0" />
    <title>Document</title>
    <style>
      canvas {
        margin: 2rem;
      }
    </style>
  </head>
  <body>
    <script src="./drawGrid.js"></script>
    <script src="./createCanvas.js"></script>
    <script>
      // 原图
      createCanvas()

      // ctx.filter = 'brightness(1.5)'
      // 设置亮度
      // 1 表示原样
      // < 1 变暗
      // > 1 变亮
      createCanvas('brightness(1.5)')
      createCanvas('brightness(1)')
      createCanvas('brightness(0.5)')
    </script>
  </body>
</html>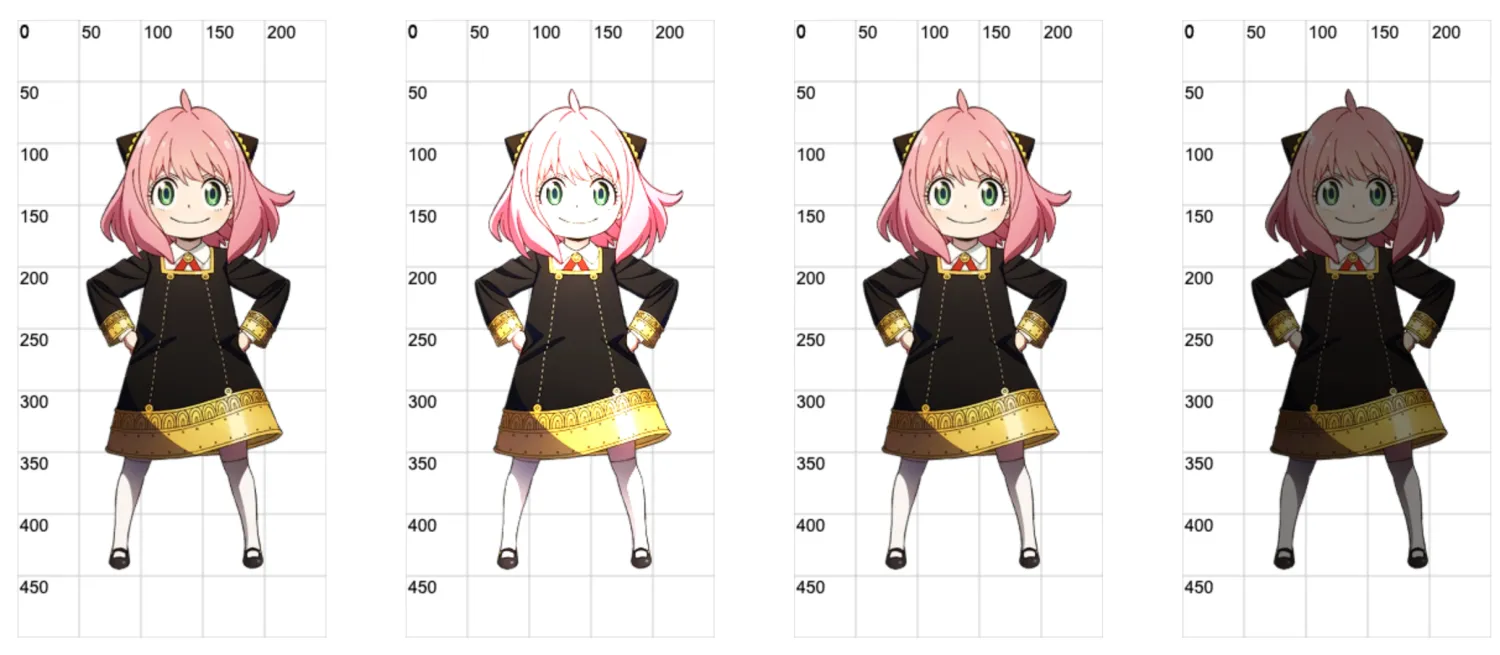
6. 💻 demo3 - hue-rotate
html
<!DOCTYPE html>
<html lang="en">
  <head>
    <meta charset="UTF-8" />
    <meta http-equiv="X-UA-Compatible" content="IE=edge" />
    <meta name="viewport" content="width=device-width, initial-scale=1.0" />
    <title>Document</title>
    <style>
      canvas {
        margin: 2rem;
      }
    </style>
  </head>
  <body>
    <script src="./drawGrid.js"></script>
    <script src="./createCanvas.js"></script>
    <script>
      // 原图
      createCanvas()

      // ctx.filter = 'hue-rotate(180deg)'
      // 用于设置色调
      // 参数表示色调旋转的角度。
      // 角度可以是从 0deg 到 360deg。
      // 其中 0deg 表示不进行色调改变,360deg 表示完全旋转一圈,效果同 0deg。
      // 不同的角度值会将颜色沿着色彩环移动,产生不同的视觉效果。
      createCanvas('hue-rotate(0deg)')
      createCanvas('hue-rotate(90deg)')
      createCanvas('hue-rotate(180deg)')
      createCanvas('hue-rotate(270deg)')
      createCanvas('hue-rotate(360deg)')
    </script>
  </body>
</html>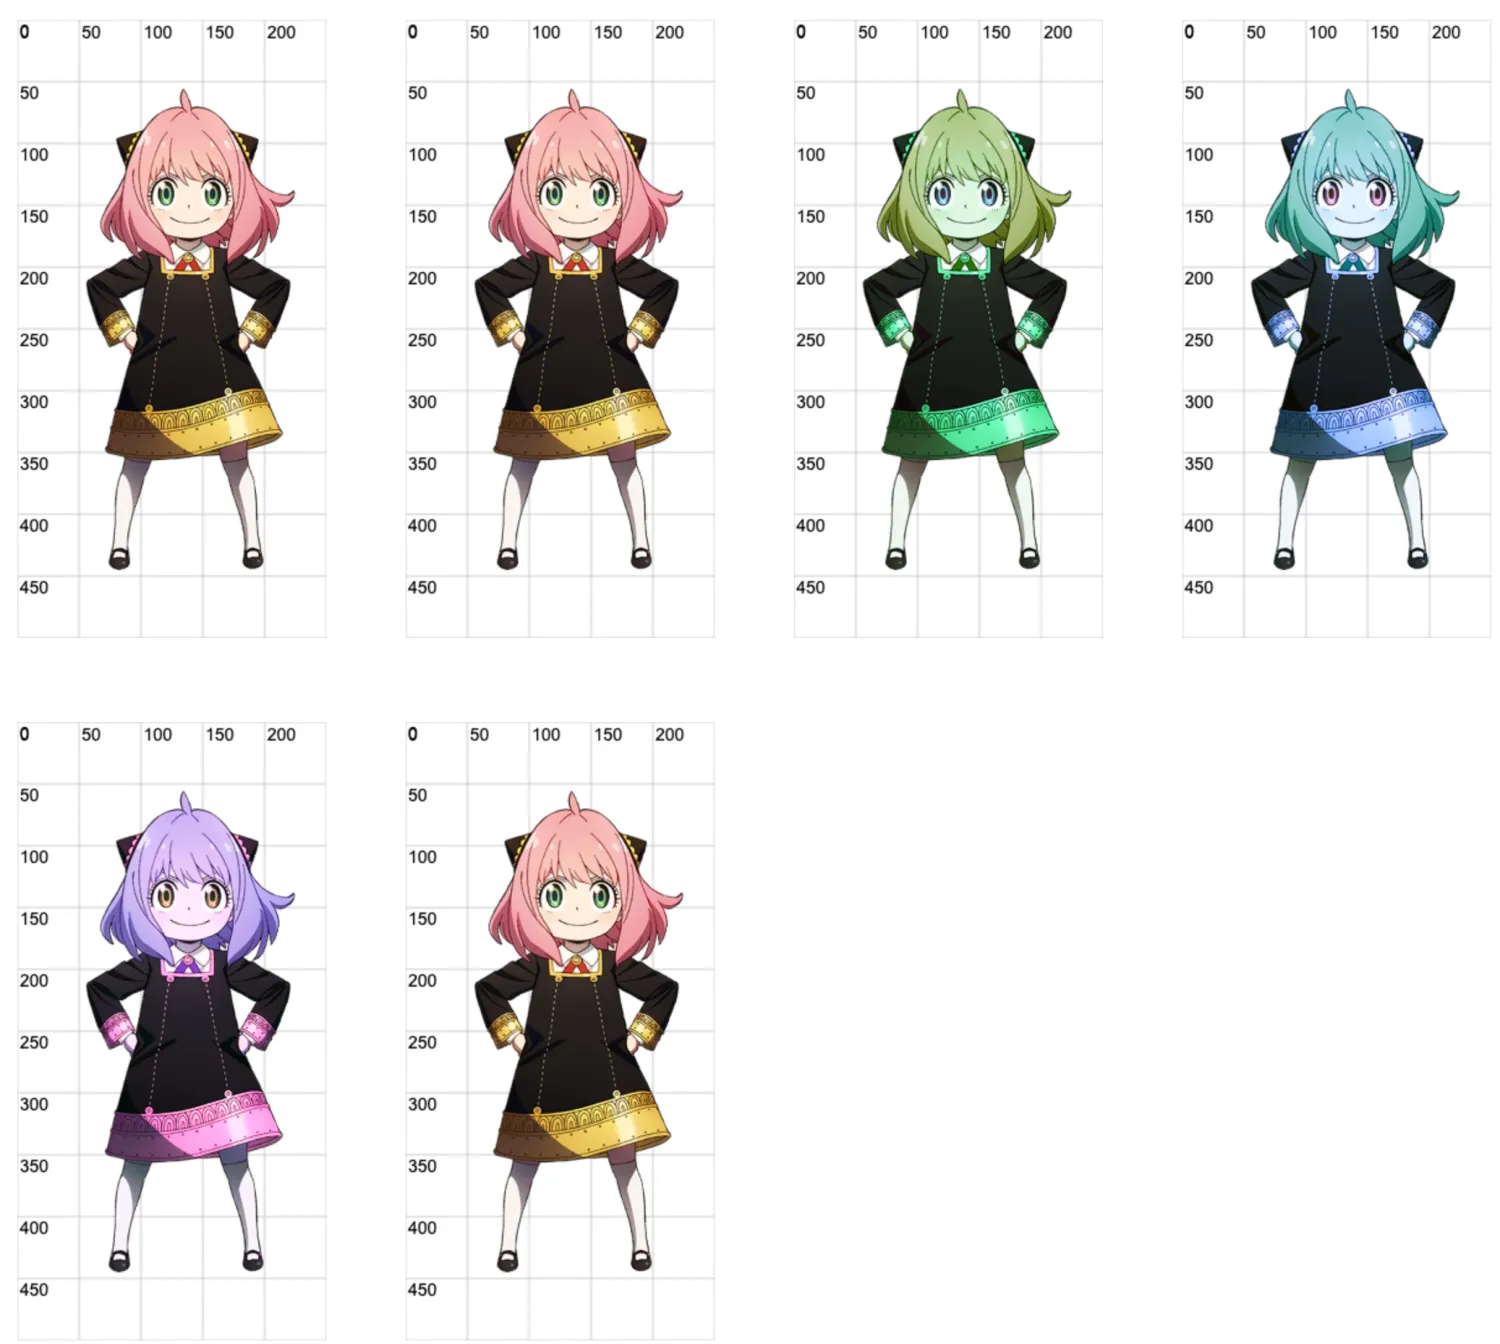
7. 💻 demo4 - drop-shadow
html
<!DOCTYPE html>
<html lang="en">
  <head>
    <meta charset="UTF-8" />
    <meta http-equiv="X-UA-Compatible" content="IE=edge" />
    <meta name="viewport" content="width=device-width, initial-scale=1.0" />
    <title>Document</title>
    <style>
      canvas {
        margin: 2rem;
      }
    </style>
  </head>
  <body>
    <script src="./drawGrid.js"></script>
    <script src="./createCanvas.js"></script>
    <script>
      // 原图
      createCanvas()

      // ctx.filter = 'drop-shadow(x y blur color)'
      // x - 阴影在水平方向上的偏移量,可以是正值或负值。
      // y - 阴影在垂直方向上的偏移量,可以是正值或负值。
      // blur - 模糊半径,定义阴影的软化程度。数值越大,阴影越模糊和扩散。
      // color - 阴影的颜色。
      createCanvas('drop-shadow(10px 10px 10px yellow)')
      createCanvas('drop-shadow(10px 10px 10px #231f1d)')
      createCanvas('drop-shadow(10px 10px 10px #e4a5a8)')
    </script>
  </body>
</html>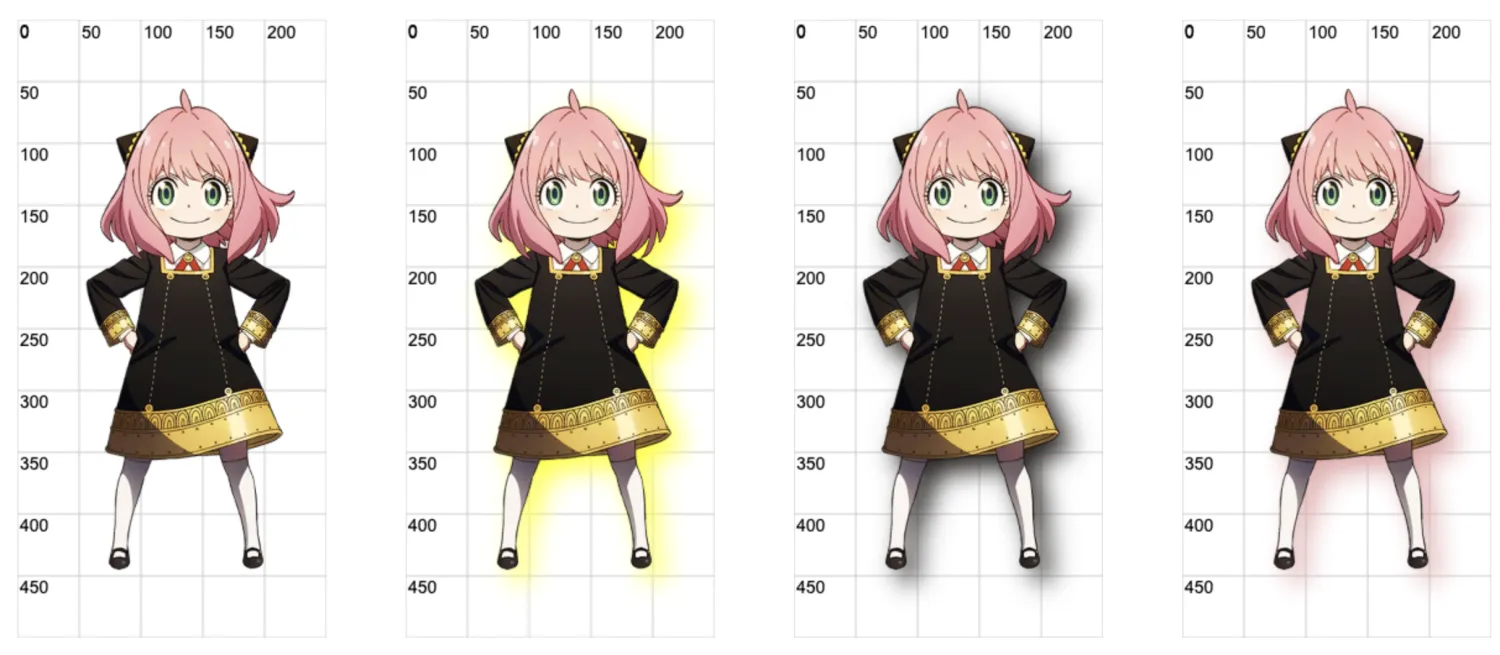
8. 💻 demo5 - invert
html
<!DOCTYPE html>
<html lang="en">
  <head>
    <meta charset="UTF-8" />
    <meta http-equiv="X-UA-Compatible" content="IE=edge" />
    <meta name="viewport" content="width=device-width, initial-scale=1.0" />
    <title>Document</title>
    <style>
      canvas {
        margin: 2rem;
      }
    </style>
  </head>
  <body>
    <script src="./drawGrid.js"></script>
    <script src="./createCanvas.js"></script>
    <script>
      // 原图
      createCanvas()

      // ctx.filter = 'invert(1)'

      // 该函数将所有颜色的值反转,例如黑变白,白变黑,以及其他颜色的相对反色。
      // 这种滤镜可以创建具有强烈视觉对比效果的图像,常用于特殊视觉效果或辅助功能(比如夜间模式或视觉障碍模式)。

      // 设置反色
      // 0   表示原样
      // 0.5 表示灰色
      // 1   表示颜色取反
      createCanvas('invert(0)')
      createCanvas('invert(0.5)')
      createCanvas('invert(1)')
    </script>
  </body>
</html>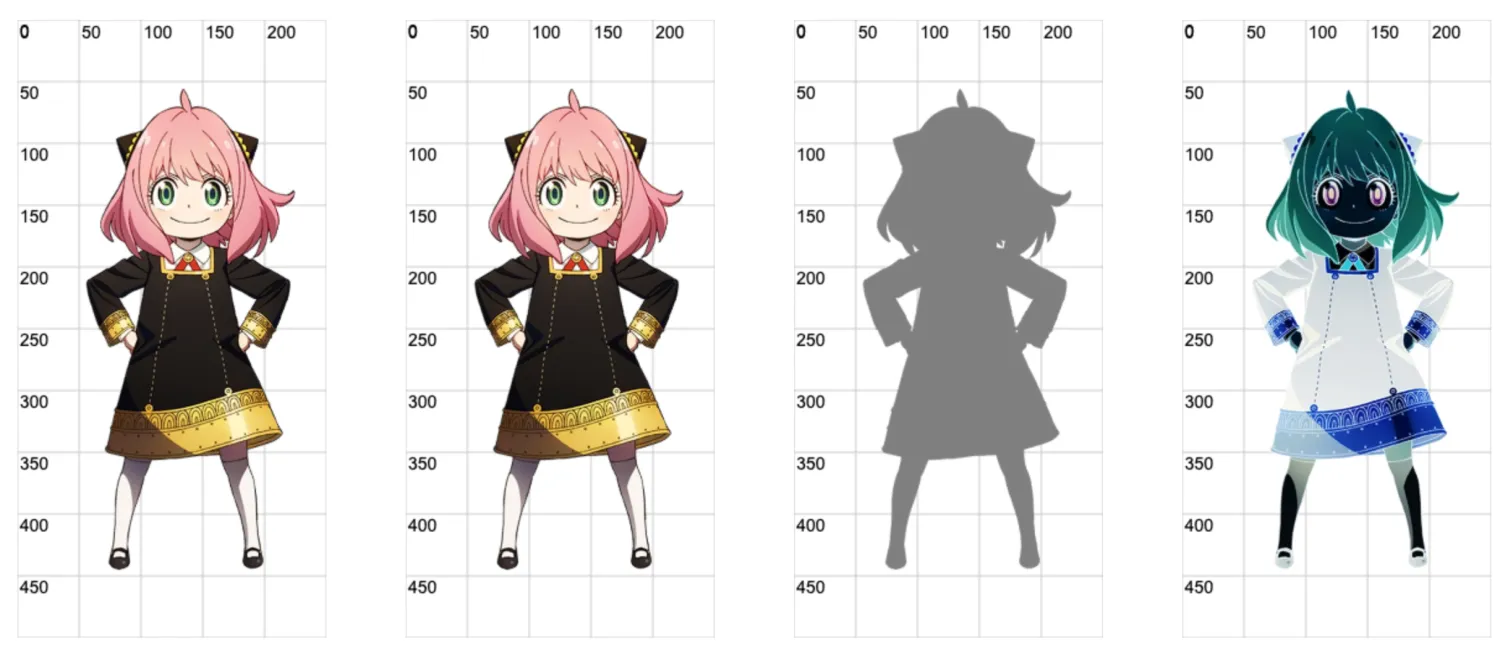
9. 💻 demo6 - sepia
html
<!DOCTYPE html>
<html lang="en">
  <head>
    <meta charset="UTF-8" />
    <meta http-equiv="X-UA-Compatible" content="IE=edge" />
    <meta name="viewport" content="width=device-width, initial-scale=1.0" />
    <title>Document</title>
    <style>
      canvas {
        margin: 2rem;
      }
    </style>
  </head>
  <body>
    <script src="./drawGrid.js"></script>
    <script src="./createCanvas.js"></script>
    <script>
      // 原图
      createCanvas()

      // ctx.filter = 'sepia(1)'
      // 用于给图像添加一种深褐色的怀旧效果,类似于早期摄影中使用的棕褐色调。
      // 0 表示原样
      // 1 怀旧风格(深褐色)
      createCanvas('sepia(0)')
      createCanvas('sepia(0.5)')
      createCanvas('sepia(1)')
    </script>
  </body>
</html>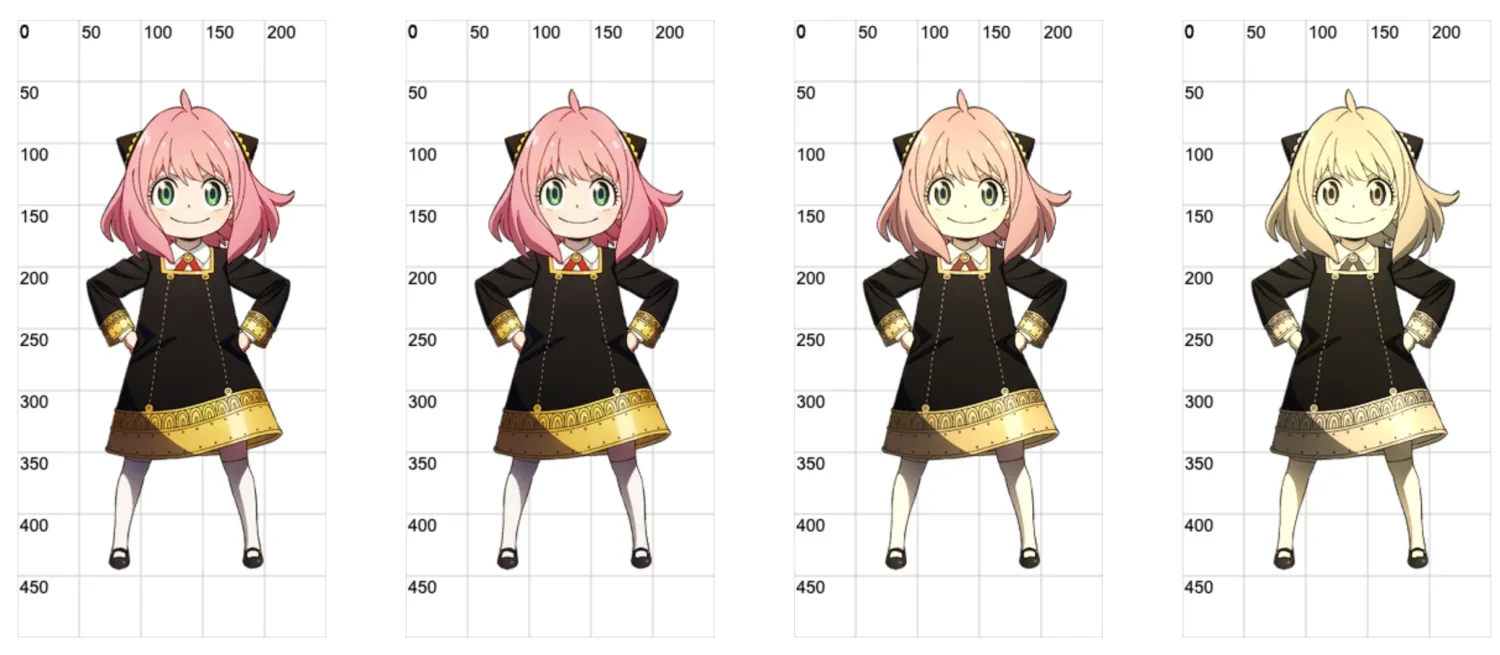
10. 💻 demo7 - grayscale
html
<!DOCTYPE html>
<html lang="en">
  <head>
    <meta charset="UTF-8" />
    <meta http-equiv="X-UA-Compatible" content="IE=edge" />
    <meta name="viewport" content="width=device-width, initial-scale=1.0" />
    <title>Document</title>
    <style>
      canvas {
        margin: 2rem;
      }
    </style>
  </head>
  <body>
    <script src="./drawGrid.js"></script>
    <script src="./createCanvas.js"></script>
    <script>
      // 原图
      createCanvas()

      // ctx.filter = 'grayscale()'
      // 设置灰度
      // 取值范围:0~1
      // 当设为 0 时,元素的颜色不发生变化。
      // 当设为 1 时,表示元素完全转为灰色,即彻底灰度化。
      createCanvas('grayscale(0)')
      createCanvas('grayscale(0.5)')
      createCanvas('grayscale(1)')
    </script>
  </body>
</html>
11. 💻 demo8 - saturate
html
<!DOCTYPE html>
<html lang="en">
  <head>
    <meta charset="UTF-8" />
    <meta http-equiv="X-UA-Compatible" content="IE=edge" />
    <meta name="viewport" content="width=device-width, initial-scale=1.0" />
    <title>Document</title>
    <style>
      canvas {
        margin: 2rem;
      }
    </style>
  </head>
  <body>
    <script src="./drawGrid.js"></script>
    <script src="./createCanvas.js"></script>
    <script>
      // 原图
      createCanvas()

      // ctx.filter = 'saturate()'
      // 设置饱和度
      // 1 表示原样
      // < 1 图像整体会变灰
      // > 1 图像整体颜色会更鲜明
      createCanvas('saturate(0.5)')
      createCanvas('saturate(1)')
      createCanvas('saturate(1.5)')
    </script>
  </body>
</html>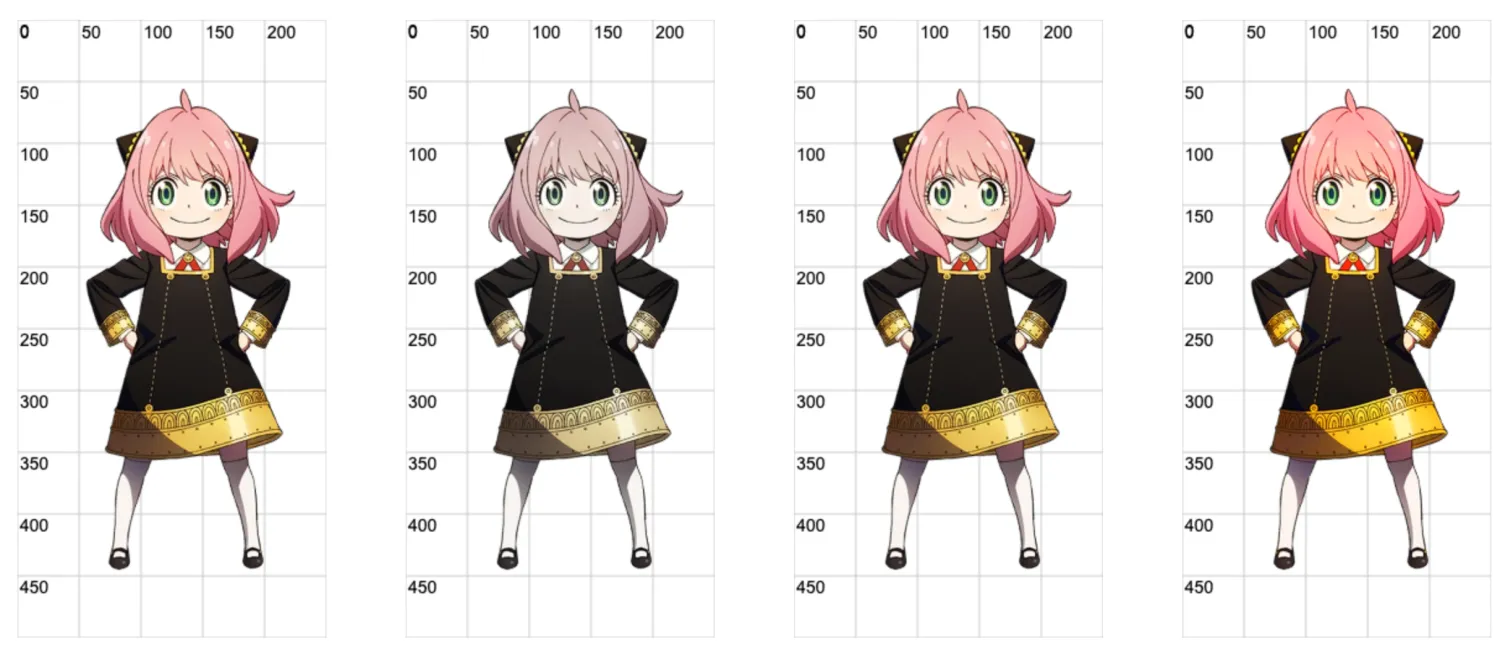
12. 💻 demo9 - contrast
html
<!DOCTYPE html>
<html lang="en">
  <head>
    <meta charset="UTF-8" />
    <meta http-equiv="X-UA-Compatible" content="IE=edge" />
    <meta name="viewport" content="width=device-width, initial-scale=1.0" />
    <title>Document</title>
    <style>
      canvas {
        margin: 2rem;
      }
    </style>
  </head>
  <body>
    <script src="./drawGrid.js"></script>
    <script src="./createCanvas.js"></script>
    <script>
      // 原图
      createCanvas()

      // ctx.filter = 'contrast()'
      // 设置对比度
      // 1 表示原样
      // < 1 对比度减弱,图像各部分颜色更加接近
      // > 1 对比度增强,颜色更鲜明
      createCanvas('contrast(0.5)')
      createCanvas('contrast(1)')
      createCanvas('contrast(1.5)')
    </script>
  </body>
</html>
13. 💻 demo10 - 使用 url 引用 svg 滤镜
html
<!DOCTYPE html>
<html lang="en">
  <head>
    <meta charset="UTF-8" />
    <title>Canvas Using SVG Filter</title>
  </head>
  <body>
    <svg width="0" height="0">
      <!-- 定义一个 svg 滤镜 -->
      <defs>
        <filter id="blur-filter">
          <feGaussianBlur in="SourceGraphic" stdDeviation="5"></feGaussianBlur>
        </filter>
      </defs>
    </svg>


    <script src="./drawGrid.js"></script>
    <script>
      const canvas = document.createElement('canvas')
      drawGrid(canvas, 200, 200, 50)
      document.body.appendChild(canvas)
      const ctx = canvas.getContext('2d')

      // 引用 svg 滤镜。
      ctx.filter = 'url(#blur-filter)'

      // 绘制一个矩形
      ctx.fillStyle = 'red'
      ctx.fillRect(50, 50, 100, 100)
    </script>
  </body>
</html>