0035. 使用 ctx.drawImage 引入图像
1. 📝 简介
一共有 3 种传参方式:
drawImage(image, dx, dy)drawImage(image, dx, dy, dWidth, dHeight)drawImage(image, sx, sy, sWidth, sHeight, dx, dy, dWidth, dHeight)最后一种能用来模拟截图效果。
2. 🔗 links
- https://developer.mozilla.org/en-US/docs/Web/API/CanvasRenderingContext2D/drawImage - MDN -
ctx.drawImage
3. 📒 notes
ctx.drawImage 常见有 3 种写法:
drawImage(image, dx, dy)drawImage(image, dx, dy, dWidth, dHeight)drawImage(image, sx, sy, sWidth, sHeight, dx, dy, dWidth, dHeight)

ctx.drawImage 从单词角度出发,draw 表示画,Image 表示图片,这 API 是用来画图片的。有 3 种常见用法,其中“截图”功能比较 🐂 🍺,可以玩出很多花样。
你可以自由裁剪图片的某一部分矩形区域来显示,实现仅展示一张图片的局部效果,在制作一些简单的连续的动画效果时特别有用。
4. 💻 demo1 - 保持图片原始尺寸
html
<!DOCTYPE html>
<html lang="en">
  <head>
    <meta charset="UTF-8" />
    <meta name="viewport" content="width=device-width, initial-scale=1.0" />
    <title>📝 使用 ctx.drawImage 引入图像</title>
  </head>
  <body>
    <script src="./drawGrid.js"></script>
    <script>
      const cavnas = document.createElement('canvas')
      drawGrid(cavnas, 1500, 1000, 50)
      document.body.appendChild(cavnas)

      const ctx = cavnas.getContext('2d')

      // ctx.drawImage(imgSource, x, y)
      // x, y 表示在图像在 canvas 画布中放置的起始坐标位置。
      // 这种写法会按照图像原大小展示。

      const img = new Image()
      img.src = './week.png'
      img.onload = function () {
        // ctx.globalAlpha = 0.5
        ctx.drawImage(img, 100, 100)
      }
    </script>
  </body>
</html>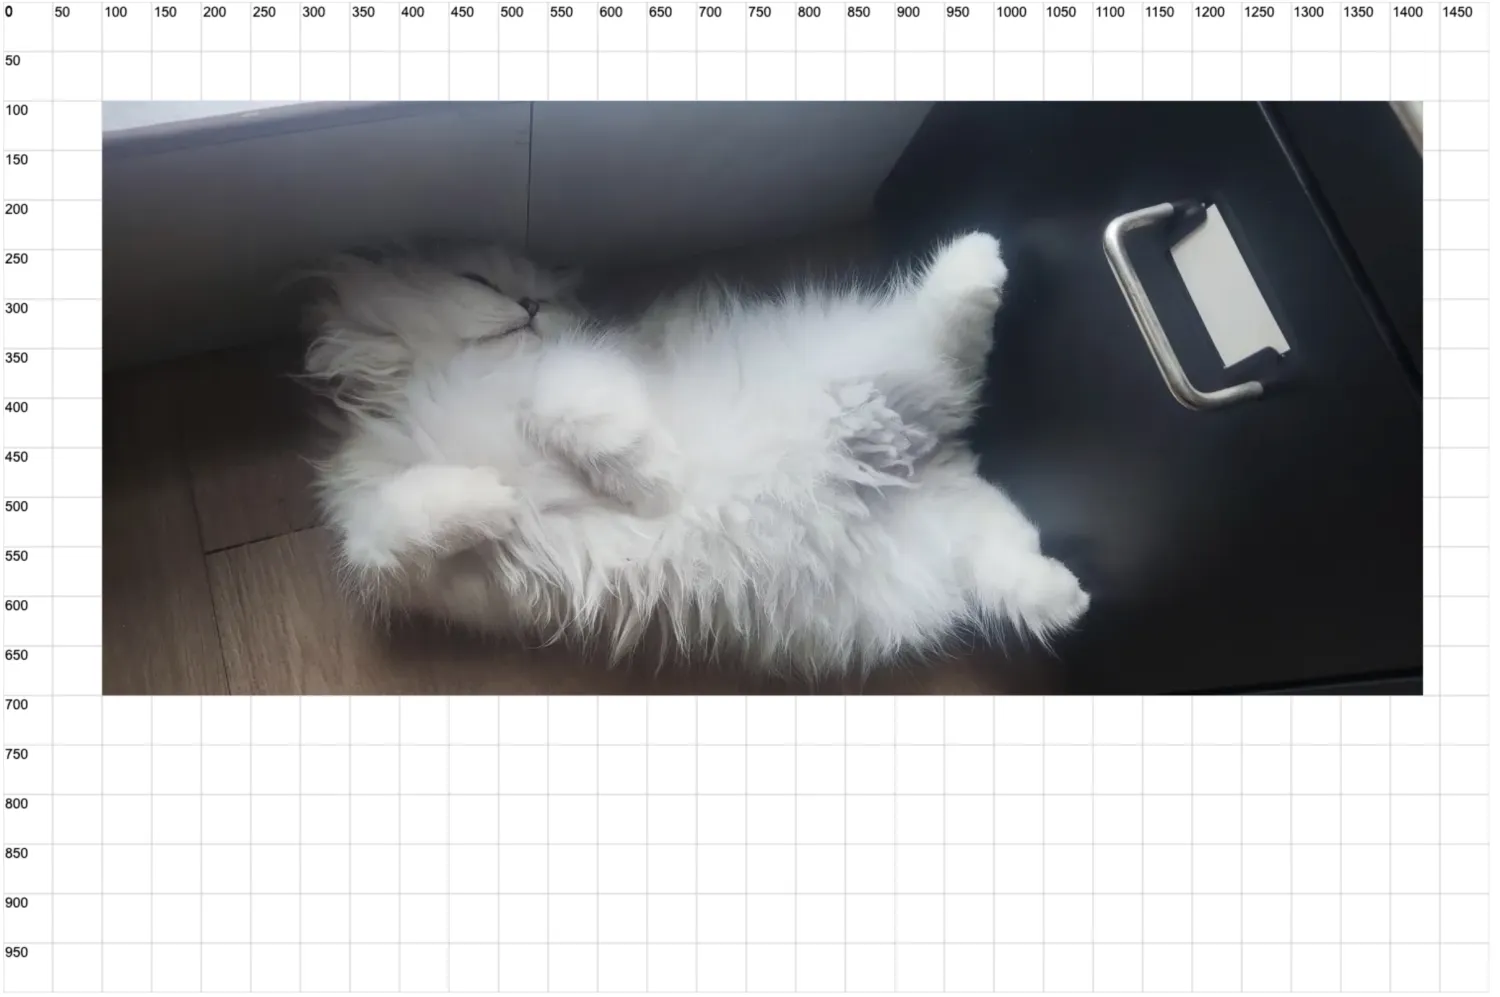
5. 💻 demo2 - 约束图片尺寸
html
<!DOCTYPE html>
<html lang="en">
  <head>
    <meta charset="UTF-8" />
    <meta name="viewport" content="width=device-width, initial-scale=1.0" />
    <title>📝 使用 ctx.drawImage 引入图像</title>
  </head>
  <body>
    <script src="./drawGrid.js"></script>
    <script>
      const cavnas = document.createElement('canvas')
      drawGrid(cavnas, 500, 500, 50)
      document.body.appendChild(cavnas)

      const ctx = cavnas.getContext('2d')

      // ctx.drawImage(imgSource, x, y, width, height)

      // x, y
      // 表示在图像在 canvas 画布中放置的起始坐标位置。

      // width, height
      // 表示图像展示的大小,此时图片会按照指定的尺寸展示。
      // 如果照片儿的宽高比和指定的宽高比不一致,图片会被拉伸或压缩。

      const img = new Image()
      img.src = './week.png'
      img.onload = function () {
        ctx.drawImage(img, 100, 100, 300, 150)
      }
    </script>
  </body>
</html>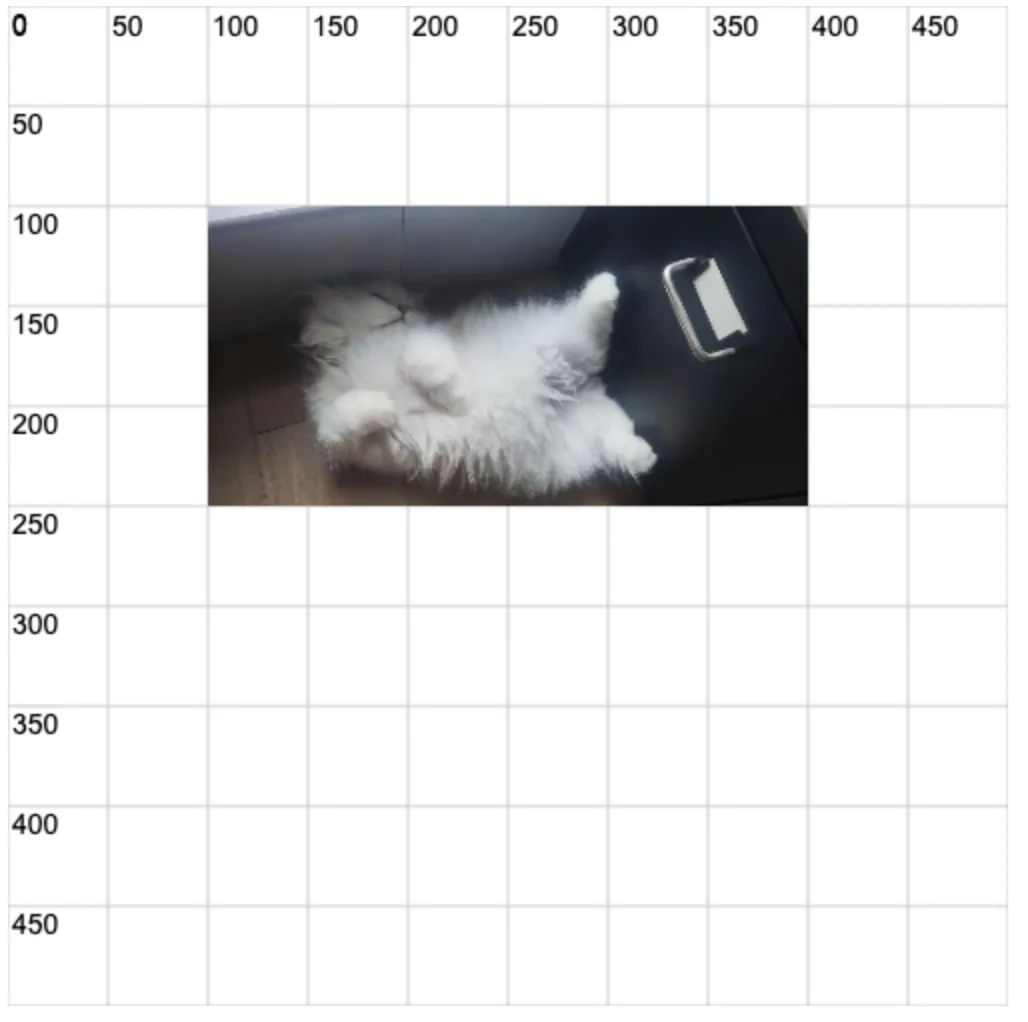
6. 💻 demo3 - 裁剪图片
html
<!DOCTYPE html>
<html lang="en">
<head>
<meta charset="UTF-8" />
<meta name="viewport" content="width=device-width, initial-scale=1.0" />
<title>📝 使用 ctx.drawImage 引入图像</title>
</head>
<body>
<script src="./drawGrid.js"></script>
<script>
const cavnas = document.createElement('canvas')
drawGrid(cavnas, 1500, 1000, 50)
document.body.appendChild(cavnas)
const ctx = cavnas.getContext('2d')
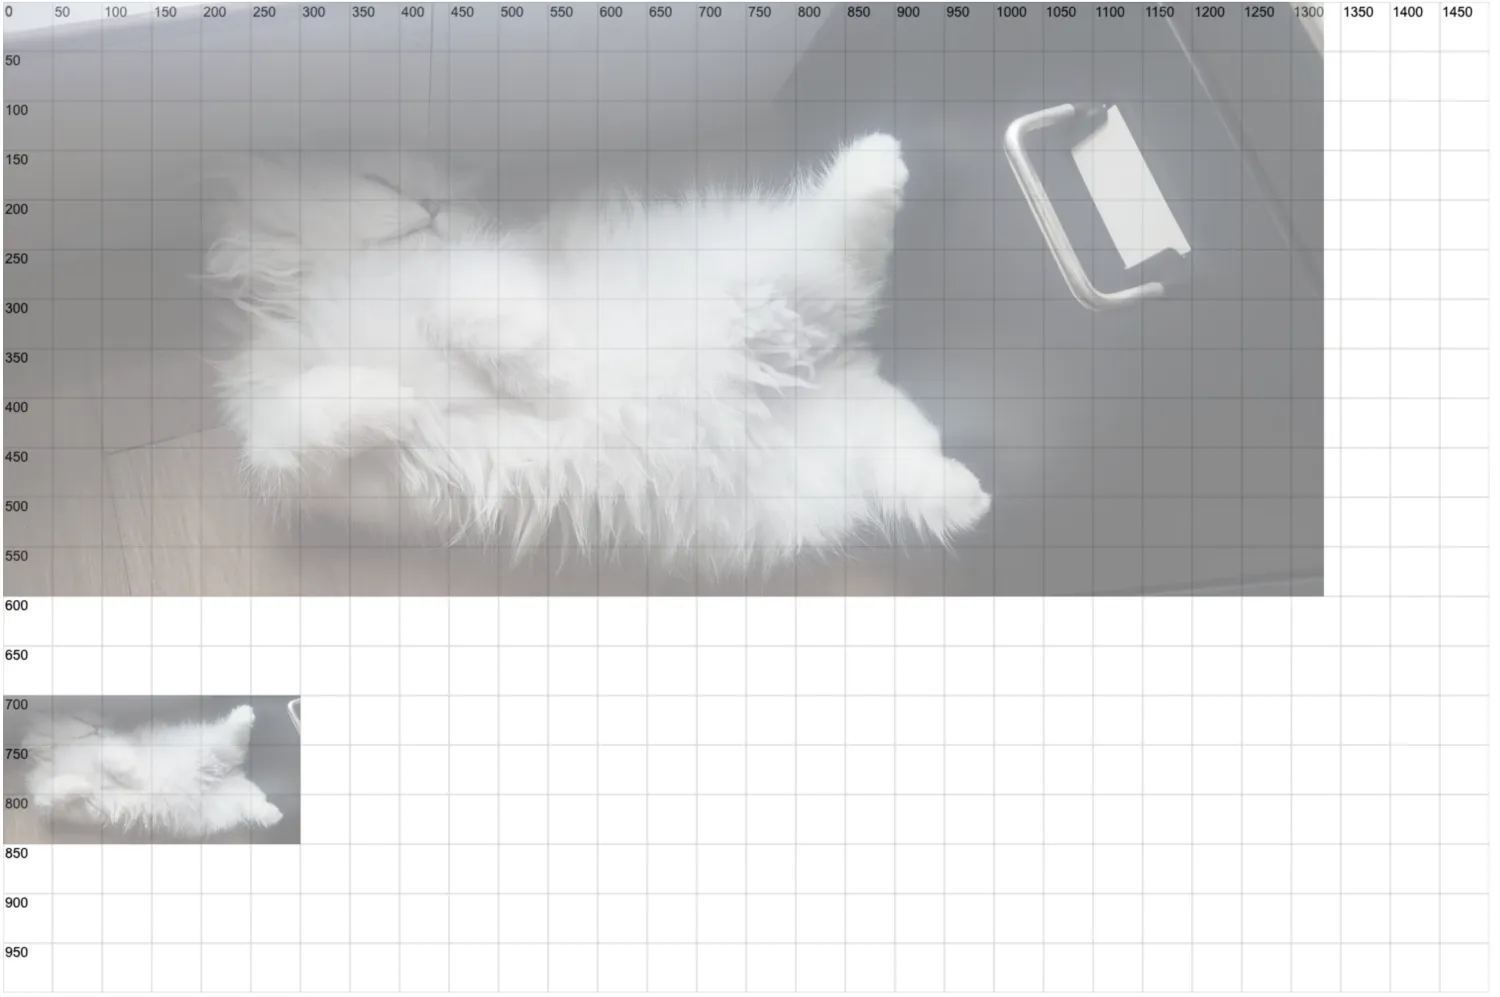
// ctx.drawImage(imgSource, x1, y1, w1, h1, x2, y2, w2, h2)
// x1 y1 w1 h1 表示图像的“截图”区域(基于图像的坐标系)
// x2 y2 w2 h2 表示画布展示区域(基于画布的坐标系)
const img = new Image()
img.src = './week.png'
img.onload = function () {
ctx.globalAlpha = 0.5
ctx.drawImage(img, 0, 0)
ctx.drawImage(
img,
150,
100,
900,
img.height - 100,
0,
700,
300,
150
)
}
</script>
</body>
</html>ctx.globalAlpha = 0.5 设置为半透明的效果,以便查看坐标。