0008. 使用 ctx.lineCap 设置线条端点样式
1. 📒 notes
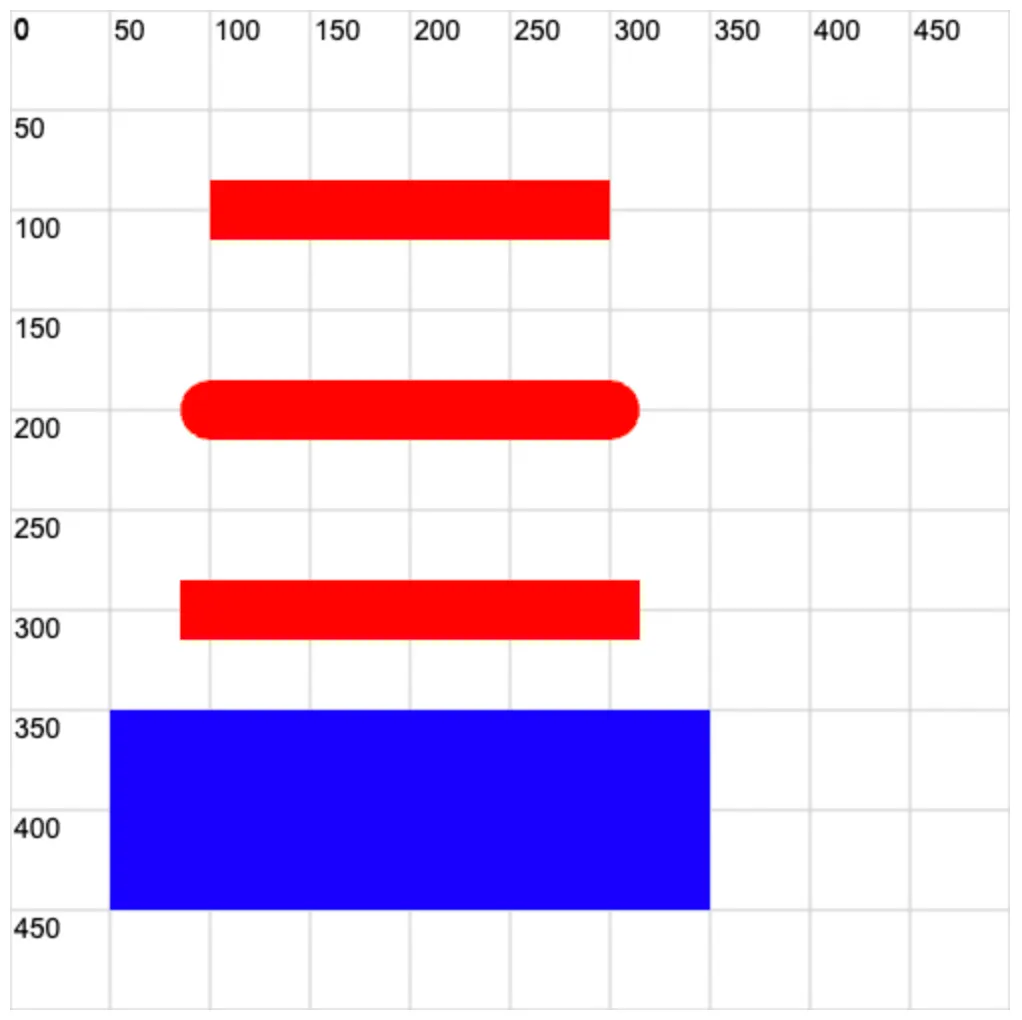
lineCap 表示线帽,也就是线条的端点。ctx.lineCap 这玩意儿是用来设置线条端点样式的。
知道 ctx.lineCap 这玩意儿是用来配置啥玩意儿的即可,很简单,看看最终的渲染结果和对应的字符串(butt、round、square)自然就理解了。
2. 💻 demo
html
<!-- 1.thml -->
<!DOCTYPE html>
<html lang="en">
  <head>
    <meta charset="UTF-8" />
    <meta name="viewport" content="width=device-width, initial-scale=1.0" />
    <title>demo</title>
  </head>
  <body>
    <script src="./drawGrid.js"></script>
    <script>
      const cavnas = document.createElement('canvas')
      drawGrid(cavnas, 500, 500, 50)
      document.body.appendChild(cavnas)
      const ctx = cavnas.getContext('2d')

      // 把线条设置得粗一些,以便查看效果。
      ctx.lineWidth = 30
      ctx.strokeStyle = 'red'

      // ctx.lineCap 用于设置线条两端的样式。

      ctx.beginPath()
      ctx.lineCap = 'butt'
      // 线条两端以方形结束。
      // 这也是默认值。
      ctx.moveTo(100, 100)
      ctx.lineTo(300, 100)
      ctx.stroke()

      ctx.beginPath()
      ctx.lineCap = 'round'
      // 线条两端以圆形结束。
      ctx.moveTo(100, 200)
      ctx.lineTo(300, 200)
      ctx.stroke()

      ctx.beginPath()
      ctx.lineCap = 'square'
      // 线条两端以方形结束。
      // 增加了一个宽度是线条厚度一半的矩形。
      ctx.moveTo(100, 300)
      ctx.lineTo(300, 300)
      ctx.stroke()

      ctx.beginPath()
      ctx.lineWidth = 100 // 刻意将线条的厚度设置为 100
      ctx.strokeStyle = 'blue'
      ctx.lineCap = 'square' // 两端将各自多出 100/2 也就是 50 的矩形
      ctx.moveTo(100, 400)
      ctx.lineTo(300, 400)
      ctx.stroke()
    </script>
  </body>
</html>